Materials: shared surfaces and maps
Select a material, inspect it on the right
Open QWAY → Materials. This is a browser of reusable materials in the current project. Select a card to open its properties in the right-hand Inspector; the bottom panel remains the material browser. Search by name, source alias or category.
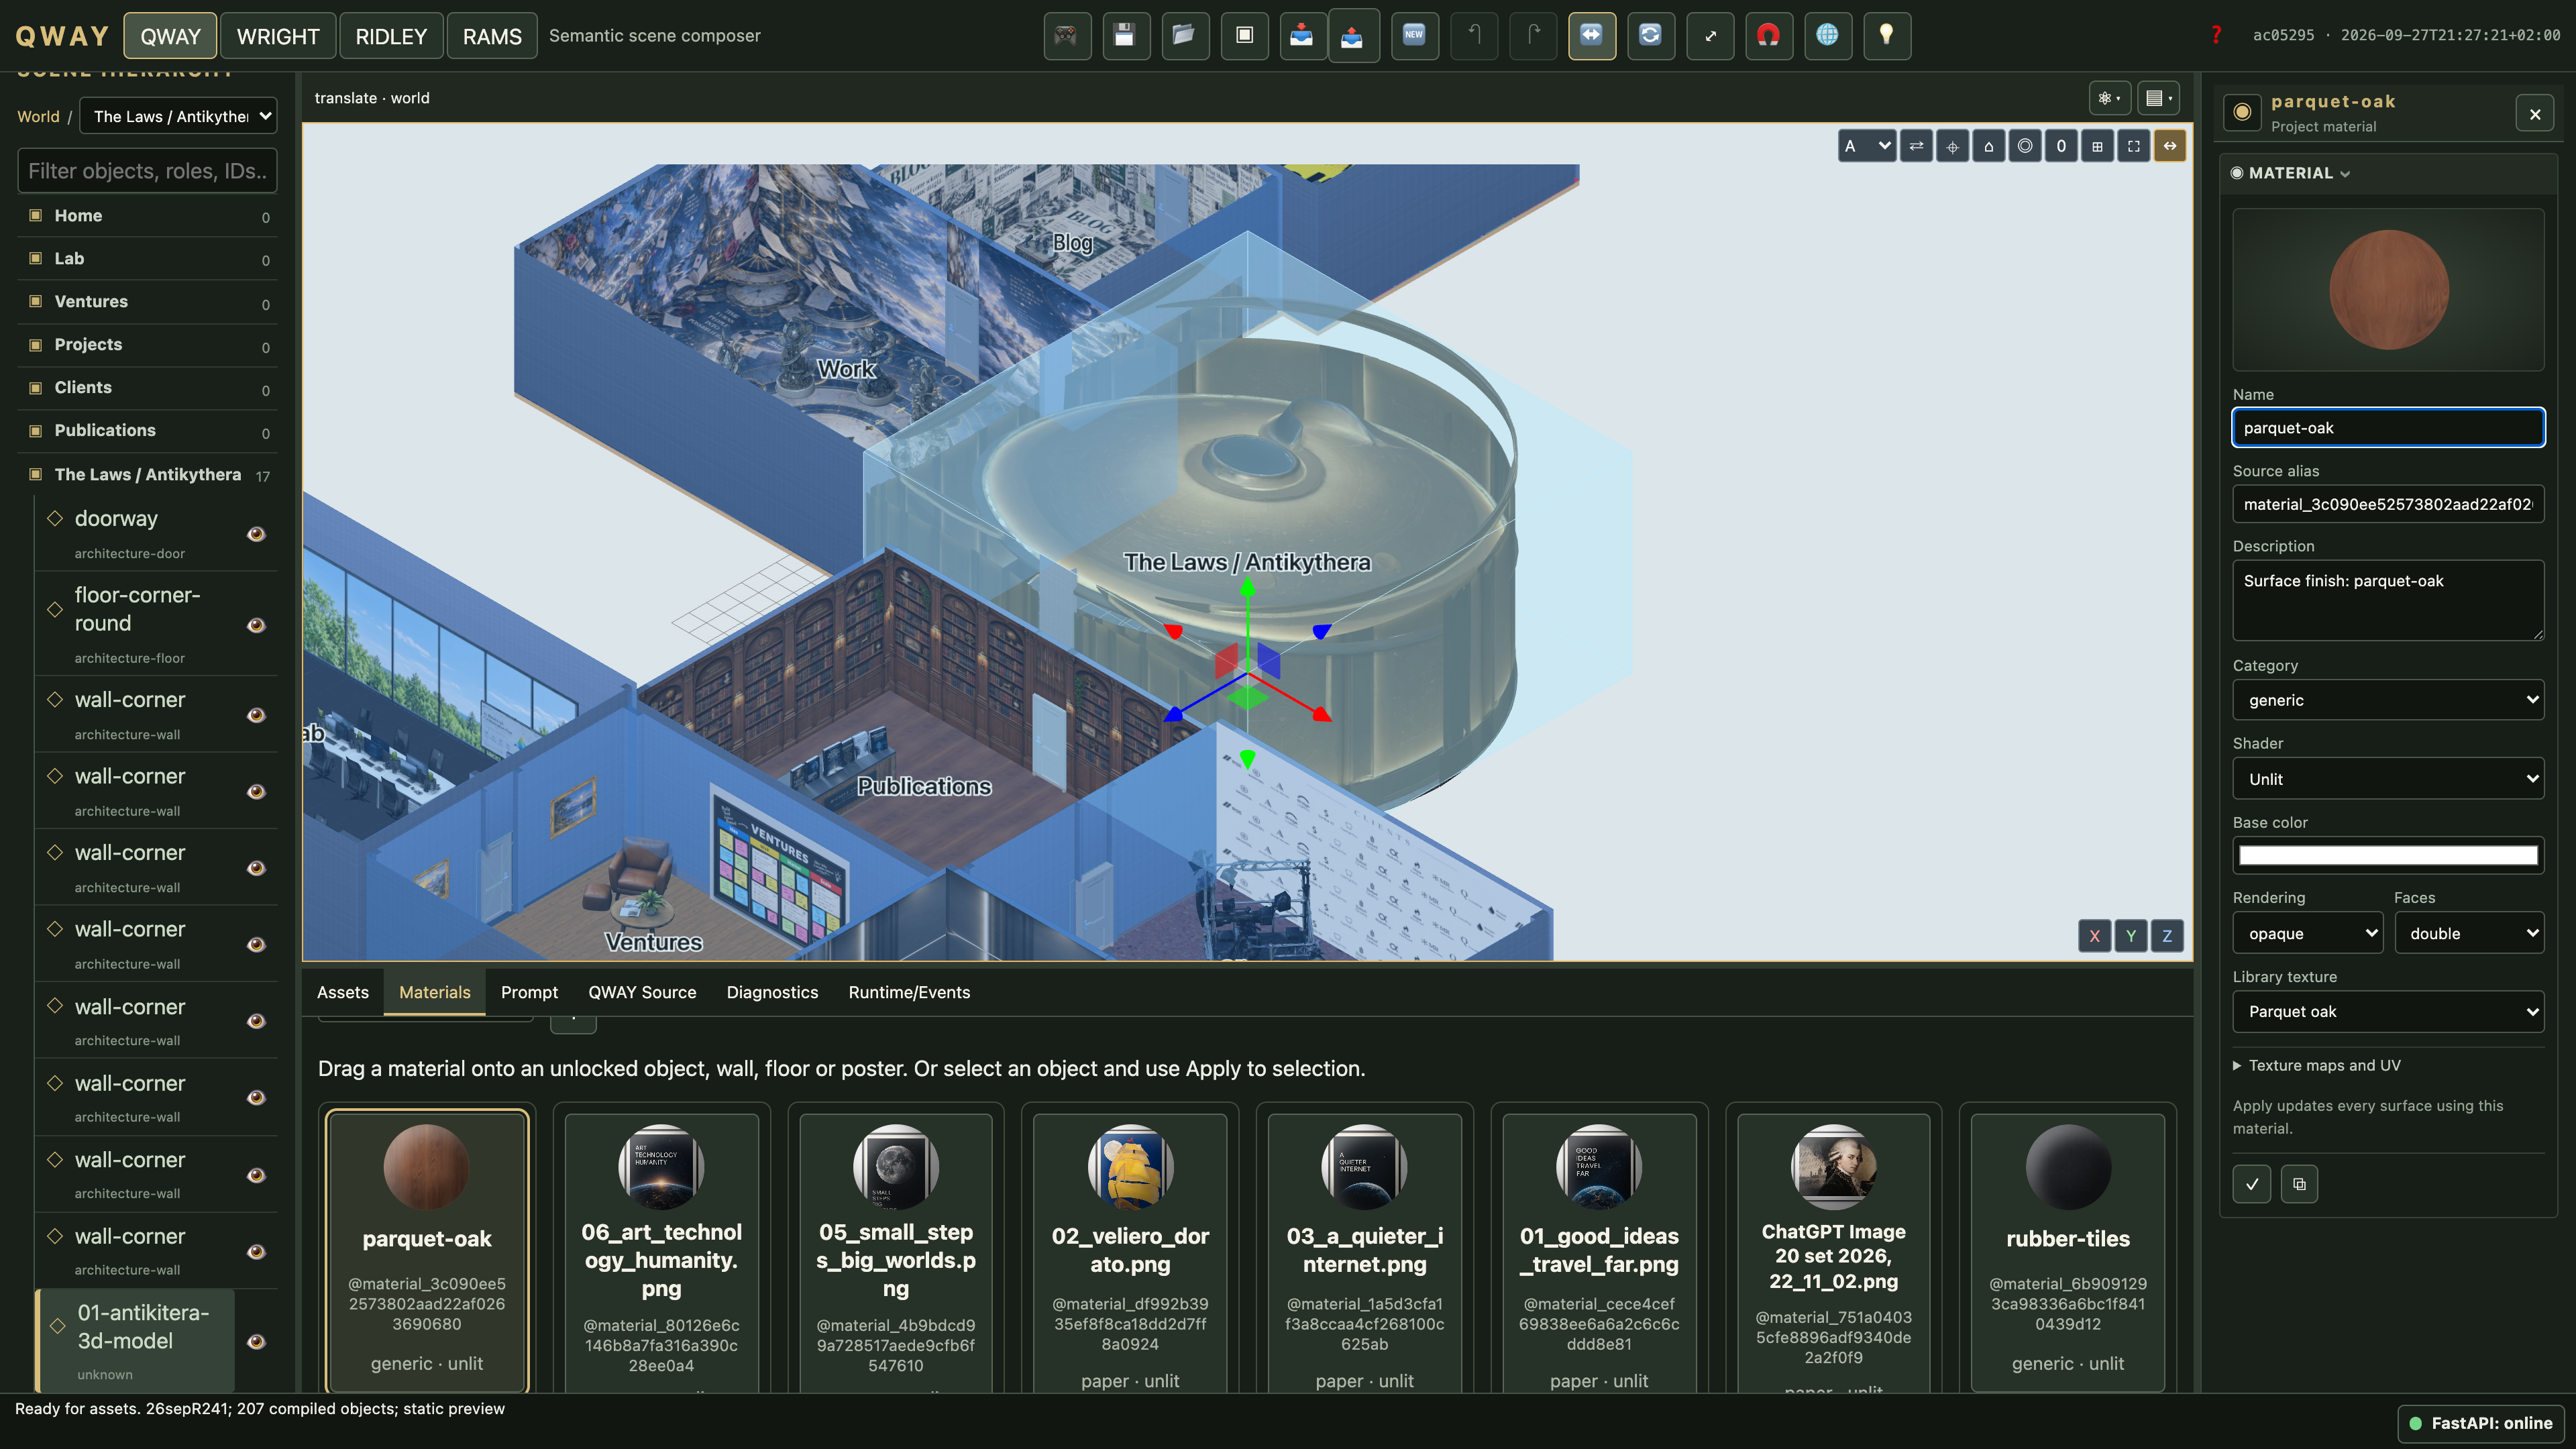
- Select an existing material, or choose New material. Give it a readable name, a unique source alias and a useful category.
- Choose Standard for metallic/roughness lighting or Unlit for a surface that should not respond to scene lighting.
- Adjust colour, roughness, metalness, emission, opacity and face/alpha settings as needed. Inspect the actual surface in the 3D viewport.
- Choose Apply material to commit the change. All surfaces assigned to that shared resource update together. Undo restores the previous authoring state.
Assign, share or make unique
Drag a material card onto a visible object, wall, floor or poster. The target outline identifies what will receive the material. For keyboard use, select the target and choose Apply to selection. Locked objects reject drops; an object behind a locked surface is not silently selected instead.
| Action | Result |
|---|---|
| Apply material | Updates the shared resource and every assigned surface. |
| Make unique | Creates an independent material and assigns it to this target. |
| Use original material | Removes the override and restores the embedded GLB material. |
| Undo / Redo | Restores the authored assignment or property edit. |
Select an object or its poster entry to inspect the assigned material. WRIGHT room backdrops use the same material system. A material changes appearance, not collision geometry or the size of the object.
Texture maps and UV placement
Uploaded images are immutable resources. Use the supported material-map slots and UV offset, repeat and rotation controls to place them. Check transparency and the back of thin surfaces before choosing single- or double-sided rendering. A repeated floor texture and a uniquely placed poster need different UV settings.
Keep the source image in the authoring project. WorldPack export generates the desktop/mobile derivatives; lowering an export texture resolution should not require degrading your original project. Built-in floor presets remain application resources and are distinct from uploaded maps.
When the material looks wrong
- Confirm the intended object or material card is selected; the Inspector follows selection.
- Check whether you edited a shared material: several surfaces changing together can be intentional.
- Use Make unique before a change that belongs to only one surface.
- Allow image decoding and GPU upload to finish. A visible object can precede its final textures.
- Check lighting, UV mapping, alpha mode and whether the GLB has several material slots.
- Stop playback/simulation and resolve invalid authoring drafts before assigning a material.